How to Replace a Well Jet Pump? Step-by-Step Guide
How to replace a well jet pump? Replacing a well jet pump might seem like a daunting task, but it's something any homeowner can tackle with the right guidance.
Replacing a well jet pump might seem like a daunting task, but it’s something any homeowner can tackle with the right guidance. This guide will walk you through the entire process of replacing your pump, ensuring you have reliable water access once more. Knowing how to replace a well pump not only saves you money on professional services but also gives you a sense of accomplishment.
Before you get started, it’s important to understand the basics of your pumping system and make all the necessary preparations. I’ll cover how to safely remove the old pump and install a new jet pump, along with tips for troubleshooting common issues that may arise during the process. With the right tools and a bit of patience, you’ll find this project straightforward.
Let’s dive in and make sure you have everything you need to get your water flowing without a hitch.
Key Takeaways
- Understand your well system before beginning the replacement.
- Follow step-by-step instructions for safe removal and installation.
- Troubleshoot any issues to ensure your new pump operates effectively.
Understanding the Basics
Before diving into the process of replacing a well jet pump, it’s important to understand the types of pumps, how to identify your well type, and the signs that indicate you may need a replacement. This knowledge will help ensure you’re prepared and informed throughout the process.
Types of Well Pumps
There are generally two main types of well pumps: jet pumps and submersible pumps.
Jet pumps are typically used for shallow wells where the water is less than 25 feet deep. They are installed above ground and use suction to draw water up.
Submersible pumps, on the other hand, are designed for deeper wells. These pumps are submerged in the water and push it up to the surface. Understanding which type you have is crucial for replacements.
Troubleshooting is often necessary if you notice issues like low water pressure or no water coming from the tap. Knowing your pump type will help target the problem effectively.
Determining Your Well Type
To determine your well type, you need to know how deep it is. If your water source is approximately 25 feet or shallower, you likely have a shallow well using a jet pump. If the water is deeper, it’s likely a submersible pump setup.
When checking your well, look for the following:
- Pump Location: Is it above ground (jet) or below surface (submersible)?
- Piping System: Look for a two-pipe configuration, which often indicates a jet system.
Take a moment to measure the depth of your well if it’s accessible. This will help me or anyone else working on the pump to know exactly what we are dealing with.
Signs You Need a Replacement
There are several clear signs that indicate it might be time to replace your well pump. First, if you experience low water pressure, this can signal a failing pump. Regular pressure should remain steady; any abrupt changes can hint at underlying issues.
Another sign is hearing unusual noises coming from your pump. Sounds like grinding, rattling, or whirring can mean your pump isn’t operating efficiently.
Lastly, if there’s no water at all flowing into your home, it’s often a signal that the pump has failed, particularly if power and water lines are intact.
Recognizing these signs early can save time and prevent further damage, making the replacement process smoother.
Preparing for the Replacement
Before starting the replacement of a well jet pump, it’s critical to prepare properly. I want to make sure I have everything in place to work safely and efficiently. This includes understanding safety guidelines, gathering required tools and materials, and ensuring the power is turned off.
Safety First
Safety is my top priority. I always put on gloves and safety goggles to protect against sharp edges and debris. If I’m working with electrical components, I make sure to wear rubber-soled shoes.
I also follow important safety guidelines. This includes not working alone if possible, especially when handling heavy equipment. It’s key to keep a first-aid kit nearby, just in case of any mishaps.
Finally, I ensure my workspace is clear of clutter. A tidy area minimizes the chances of accidents. Remember, taking these precautions can prevent injuries and make the job run smoothly.
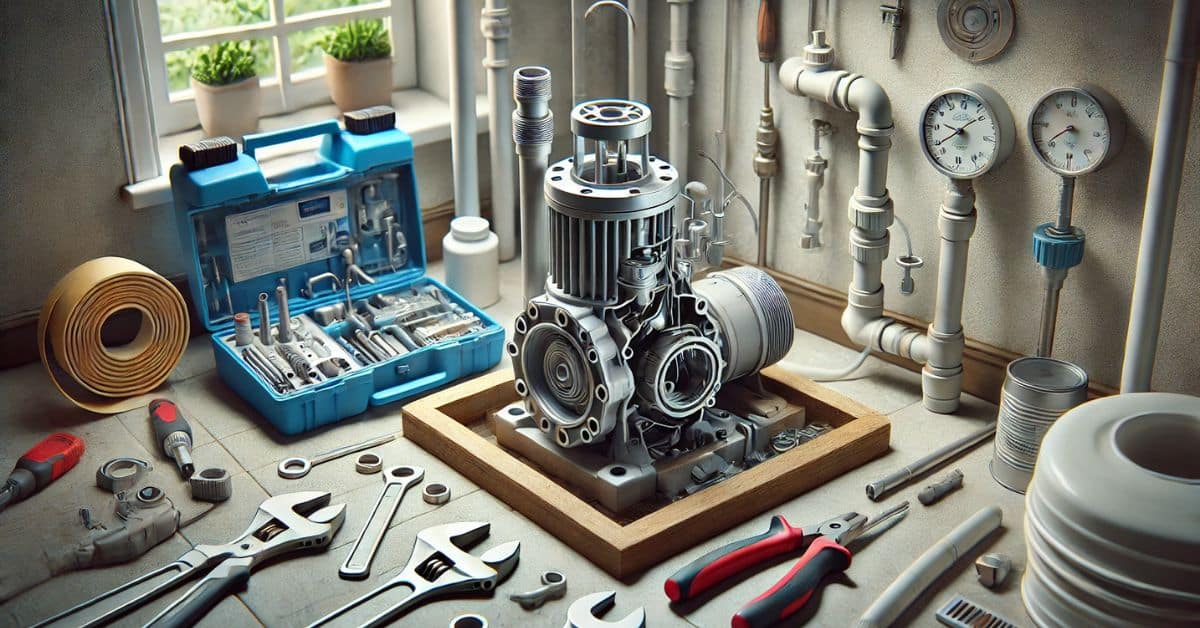
Required Tools and Materials
Gathering the right tools and materials is essential. I make a checklist to ensure I have everything before starting. Here are the basics:
- Wrenches: For loosening and tightening connections.
- Screwdrivers: A mix of flathead and Phillips for various parts.
- Pliers: Useful for pulling or gripping components.
- PVC pipe and fittings: Often needed for the plumbing connections.
- Teflon tape: For sealing threads and preventing leaks.
Additionally, I prepare safety materials like gloves, goggles, and a first-aid kit. Gathering everything beforehand saves time and frustration while I work. It helps me focus on getting the job done right.
Shutting Off the Power
Before I touch anything electrical, I always shut off the power. This is a crucial step and cannot be overlooked. I head to the circuit breaker box and locate the switch for the well pump.
Once I find it, I turn it off, and then I use a voltage tester to confirm the power is off. It’s better to be safe than sorry.
Next, I secure the circuit breaker with tape or leave a note on it to prevent anyone from accidentally turning it back on while I’m working. This ensures my surroundings remain safe. Taking this step helps me stay focused on replacing the pump without any unexpected surprises.
Removing the Old Pump
When replacing a well jet pump, removing the old pump is a crucial step. It involves disconnecting electrical connections, detaching the pump, and inspecting the well casing and components to ensure everything is in order for the new installation.
Disconnecting Electrical Connections
First, safety is key. I always start by turning off the power to the pump at the electrical panel. Use a voltage tester to confirm that there is no electricity running to the pump.
Next, I carefully remove the cover of the switch box. I take note of how the wires are connected. It’s a good idea to label each wire with masking tape to avoid confusion during reinstallation. I disconnect the wires, making sure to handle them with care to prevent any damage.
Detaching the Pump
Once the electrical connections are out of the way, I focus on detaching the pump. I shut off the water supply that leads to the house.
Using a wrench, I disconnect the water line from the pump. If there’s a check valve present, I ensure it’s removed separately. I carefully unbolt the pump from its mounting, keeping an eye on any clamps or fittings. I lift the pump out, making sure my grip is secure. It can be heavy!
Inspecting the Well Casing and Components
With the old pump removed, I turn my attention to the well casing and other components. I check the well casing for any signs of wear or damage. It’s crucial that the casing is intact, as any cracks can lead to contamination.
I also inspect the pitless adapter and pressure tank connections. If I spot any issues, I know I’ll need to address them before installing the new jet pump. A thorough inspection at this stage can save me time and trouble later on.
Installing the New Jet Pump
When it comes to installing a new jet pump, selecting the right one and ensuring all components are securely connected is essential. This process involves choosing the right pump type, properly assembling it, and securing everything to keep it running smoothly.
Choosing the Right Pump
First, I assess my water source to determine whether I need a shallow or deep well jet pump. For depths under 25 feet, a shallow well jet pump is suitable. However, for deeper sources, I go with a deep well jet pump that uses two pipes.
Next, I consider the horsepower needed. Typically, I aim for a pump rated between 0.5 to 1.5 horsepower for standard residential needs. A pump with too little horsepower might not draw water efficiently, while too much can lead to unnecessary costs.
Lastly, I make sure the pump has a reliable foot valve to keep the water from flowing back once the pump stops. This step is crucial to maintain efficiency and prevent damage to the system.
Assembly and Connections
With the correct pump on hand, I start by attaching the piping. I connect the pump to the water source using the appropriate fittings, ensuring they are tight to avoid leaks.
I make the electrical connections next. This is where I take extra care because improper wiring can lead to short circuits. I follow the manufacturer’s guidelines closely. If unsure, I consult an expert or refer to reliable resources like this guide for installation.
I also ensure the pump and its connections are safe from water by using weatherproof fittings. After I lay everything out, I check twice to make certain everything lines up properly. Attention to detail here saves headaches later.
Securing the Pump
After placing the pump in position, I secure it firmly. I use bolts and brackets to keep it steady and reduce vibrations during operation. This step is vital for longevity.
Next, I test the pump to make sure it works well. I prime the pump by filling it with water to avoid running it dry, which can cause damage. After priming, I turn it on and watch for any leaks around the connections. If I notice any issues, I address them right away.
Finally, I tidy up the installation. I check all electrical connections and ensure everything is safely tucked away. Keeping a neat workspace not only improves my efficiency but also adds safety.
Final Steps
After successfully installing your well jet pump, there are a few crucial actions to take to ensure it operates correctly and efficiently. This includes properly priming the pump, restoring power, and monitoring its performance.
Priming the Pump
Priming the pump is essential for its function. If air is trapped inside, it will not move water effectively. To prime, I fill the pump with water until it’s completely full.
- Locate the Priming Plug: Find the plug on the top of the pump.
- Remove the Plug: Carefully take out the plug to allow air to escape.
- Add Water: Pour water into the opening until it overflows slightly.
- Replace the Plug: Secure it tightly to avoid leaks as I restore power.
This action ensures proper water pressure and prevents damage to the pump. A properly primed pump is vital for maintaining a consistent water supply.
Restoring the Power and Testing
Once the pump is primed, the next step is restoring power. Turn off the circuit breaker if you haven’t already.
- Check the Connections: Ensure that the electrical connections are secure and correctly wired.
- Turn on the Power: Flip the circuit breaker back on and wait a moment.
After restoring power, I check the pump function by observing the water flow. Make sure the pressure switch activates when water is drawn. I monitor the water pressure, which should stabilize within the recommended range. If it doesn’t, the pump may need further adjustments.
Monitoring and Maintenance
Keeping an eye on my well jet pump is essential for long-term efficiency. I make it a habit to check the system regularly.
- Inspect for Leaks: Look around the pump and connections for any signs of leaks.
- Listen for Unusual Noises: Odd sounds may indicate problems inside the pump.
- Check the Pressure Gauge: I regularly monitor the pressure gauge to catch any drops in water pressure.
Scheduled maintenance can prevent bigger issues. Clear debris from the pump area and change filters as needed. A well-maintained pump can provide reliable service and save on repair costs in the long run.
Troubleshooting Common Issues
When dealing with a well jet pump, a few common problems may arise. Low water pressure, no water output, and unusual noises can indicate underlying issues that need attention.
Dealing with Low Water Pressure
Low water pressure can be frustrating. First, I check the pressure tank. If it’s not properly charged, the pump may struggle. Make sure the tank has the right air pressure, usually around 2 pounds lower than the cut-in pressure of the switch.
Next, I look for leaks in the plumbing. Even small leaks can cause significant pressure drops. If everything seems fine, I check the pump’s screen for clogs. Sediment can accumulate and restrict water flow.
Lastly, I ensure that the pump is operating correctly. A malfunctioning pump may not supply water at the needed pressure. If I’ve done all this and low pressure persists, it might be time to consult a professional.
Handling No Water Output
Experiencing no water output can halt daily routines. If I turn on the tap and nothing happens, the first thing I do is check the power supply. A tripped circuit breaker or blown fuse can prevent the pump from running.
Next, I look at the pressure switch. If it isn’t engaging, the pump won’t activate. Sometimes, the pump may need to be primed. Make sure that the pump is full of water to establish suction.
If I’ve ruled out these basic issues and still have no water, I check for blockages in the lines or a malfunctioning pump. Identifying the cause can prevent future headaches and get the water flowing again.
Addressing Unusual Noises
Unusual noises from the pump can indicate problems. If I hear grinding or rattling, it’s vital to investigate the cause. First, I check the mounting of the pump. Loose components can create vibrations and strange sounds.
I also listen for air leaks. If the system has air, it may cause the pump to run inefficiently. This can lead to noises that signal a problem.
Lastly, I pay attention to the motor. A humming sound might mean it’s working too hard, often due to a blockage or an electrical issue. Addressing these sounds early can help me avoid costly repairs down the line.
Frequently Asked Questions
Replacing a well jet pump can raise a lot of questions. I’ve gathered some of the most common inquiries I encounter related to the replacement process. Let’s dive into each one.
Can a homeowner tackle the replacement of a well pump on their own?
Yes, a homeowner can replace a well pump, but it requires some basic plumbing skills and tools. If you’re comfortable working with pipes and electrical connections, you can likely handle it. However, if you’re unsure, it might be wise to consult a professional.
What’s involved in switching out an above-ground well pump?
Switching out an above-ground well pump means first shutting off the power and water supply. You’ll need to disconnect the pipes and wiring from the old pump. Then, install the new pump in the same place, reconnect the pipes, and restore the power. Always check local codes for any requirements.
How much is a jet pump going to set you back when it’s time for a replacement?
The cost of a jet pump can vary greatly. On average, you might spend anywhere from $300 to $700 for the pump itself. Don’t forget to factor in additional costs for installation or any plumbing supplies you might need, which can add another few hundred dollars.
Could you walk me through the process of installing a new water pump for the house?
Sure! Start by preparing the area around the pump. Next, make sure to turn off all power sources. Disconnect the old pump’s pipes and wiring. Then, position the new pump, connecting it to the water source and ensuring all seals are tight. Finally, reconnect the power and test the system.
What are some telltale signs that your jet pump is on the fritz?
Some common signs of a failing jet pump include strange noises, reduced water pressure, or frequent cycling on and off. If you notice any of these issues, it’s best to investigate further as they may indicate pump failure.
On average, how long should you expect your well jet pump to keep pumping?
A well jet pump can last about 8 to 15 years. Factors such as water quality, usage, and maintenance play a significant role in its lifespan. Regular inspections can help you catch problems early and extend the pump’s life.

Thomas Peterson
Owner WSA
About the Author
Latest Posts
Born and raised in Nanaimo on Vancouver Island. Thomas gained a deep appreciation for the importance of clean, reliable water. With over 15 years of experience working with water treatment systems, Thomas has become a trusted expert in helping local homeowners and businesses resolve the unique challenges of well water across the Island.
From hard water and iron buildup to low water pressure and sediment issues, Thomas takes a practical, no-nonsense approach to solving water problems. Whether it’s installing filtration systems or troubleshooting well pump issues, Thomas focuses on long-lasting solutions that help people get the clean, safe water they need.
As a proud local professional, Thomas is dedicated to serving his community with honesty, quality service, and expert advice tailored to the water conditions of Vancouver Island.
Areas of Expertise: Well Service, Well Pumps, Water Filtration Systems
- Clack Water Softener Alternatives: Top Systems for Hard Water Treatment in 2025 November 8, 2025
- Best Well Water Test Kit Options for Safe Home Water Testing in 2025 November 5, 2025
- Best Well Water TDS Meter for Accurate Home Testing in 2025 November 1, 2025
- Best Well Water Sediment Filter Systems for Clean Home Water in 2025 October 29, 2025
- Best Well Water Saltless Water Softener Systems for 2025 October 26, 2025
Facebook Twitter LinkedIn Instagram Reddit
Fact Checked & Editorial Guidelines
Our Fact Checking Process
We prioritize accuracy and integrity in our content. Here’s how we maintain high standards:
- Expert Review: All articles are reviewed by subject matter experts.
- Source Validation: Information is backed by credible, up-to-date sources.
- Transparency: We clearly cite references and disclose potential conflicts.
Your trust is important. Learn more about our fact checking process and editorial policy.
Reviewed by: Subject Matter Experts
Our Review Board
Our content is carefully reviewed by experienced professionals to ensure accuracy and relevance.
- Qualified Experts: Each article is assessed by specialists with field-specific knowledge.
- Up-to-date Insights: We incorporate the latest research, trends, and standards.
- Commitment to Quality: Reviewers ensure clarity, correctness, and completeness.
Look for the expert-reviewed label to read content you can trust.